
Last updated: April 17, 2026
Key Takeaways
- Cardboard and foam prototyping enables 1-hour fit validation at zero cost for early concept checks.
- 3D printing delivers medium-fidelity functional prototypes in 1 day for $10-100 with accurate component fit.
- Laser cutting provides precise acrylic or metal panels in 1-2 days, ideal for enclosure faces and cutouts.
- Off-the-shelf modifications offer same-day functional testing by adapting existing enclosures.
- CNC sheet metal fabrication creates production-ready prototypes in 2-7 days, and Fabcon provides fast quotes that support smooth scaling to production.
Who This Enclosure Prototyping Guide Helps
This guide targets mid-level mechanical and electronics engineers, hardware startup founders, and engineering directors working on post-PCB development phases. You should have basic CAD skills in tools like Fusion 360 and access to standard prototyping equipment including calipers and measurement tools.
Before diving into methods, establish key terminology you will see throughout this guide. Design for Manufacturability (DFM) means shaping designs for efficient production. Fidelity measures how closely a prototype matches final product characteristics. Quick-turn manufacturing delivers parts in under two weeks. The 2026 hardware landscape favors US-based manufacturing partnerships amid global supply chain volatility, with metal enclosures increasingly preferred over plastic for infrastructure applications that demand durability and thermal management.
5 Fast Prototyping Methods: From Hack to Production-Ready
Each prototyping method serves specific validation needs and timeline requirements. Use the right method at the right time to move faster while controlling cost.
1. Cardboard and Foam (1 Hour, $0, Low Fidelity)
Cardboard and foam provide instant dimensional validation for initial concept testing. These materials enable rapid iteration cycles within hours, so teams can verify basic fit, proportions, and spatial relationships before investing in higher-fidelity methods. Pros include zero material cost and immediate availability. Cons include no durability testing capability and limited functional validation.
2. 3D Printing (1 Day, $10-100, Medium Fidelity)
3D printing delivers functional prototypes with enough accuracy for component fit testing. 3D printing reduces prototyping costs by up to 70% and lead times by up to 90% compared to traditional methods. FDM printing works well for initial validation, while SLA provides smoother surfaces for precise component alignment. Helpful Fusion 360 practices include designing with 0.5 mm clearances and avoiding overhangs greater than 45 degrees to prevent warping.
3. Laser Cutting Acrylic and Thin Metal (1-2 Days, $50-200, Good Panels)
Laser cutting excels for flat panel prototypes and simple enclosure geometries. This method provides clean edges and precise cutouts for connectors, switches, and mounting hardware. Material options include acrylic for visual prototypes and thin aluminum or steel for functional testing. Lead times typically range from same-day to 48 hours depending on complexity and local service availability.
4. Off-the-Shelf Modifications (Same Day, $20-100, Low-Medium Fidelity)
Modifying existing enclosures from suppliers like Hammond Manufacturing or repurposing consumer products offers immediate solutions for proof-of-concept testing. This approach works particularly well for one-off demonstrations or when standard form factors meet project requirements. Common modifications include drilling new holes, adding cutouts, or combining multiple enclosures.
5. CNC and Sheet Metal Quick-Turn (2-7 Days, $500-2k, Production Fidelity)
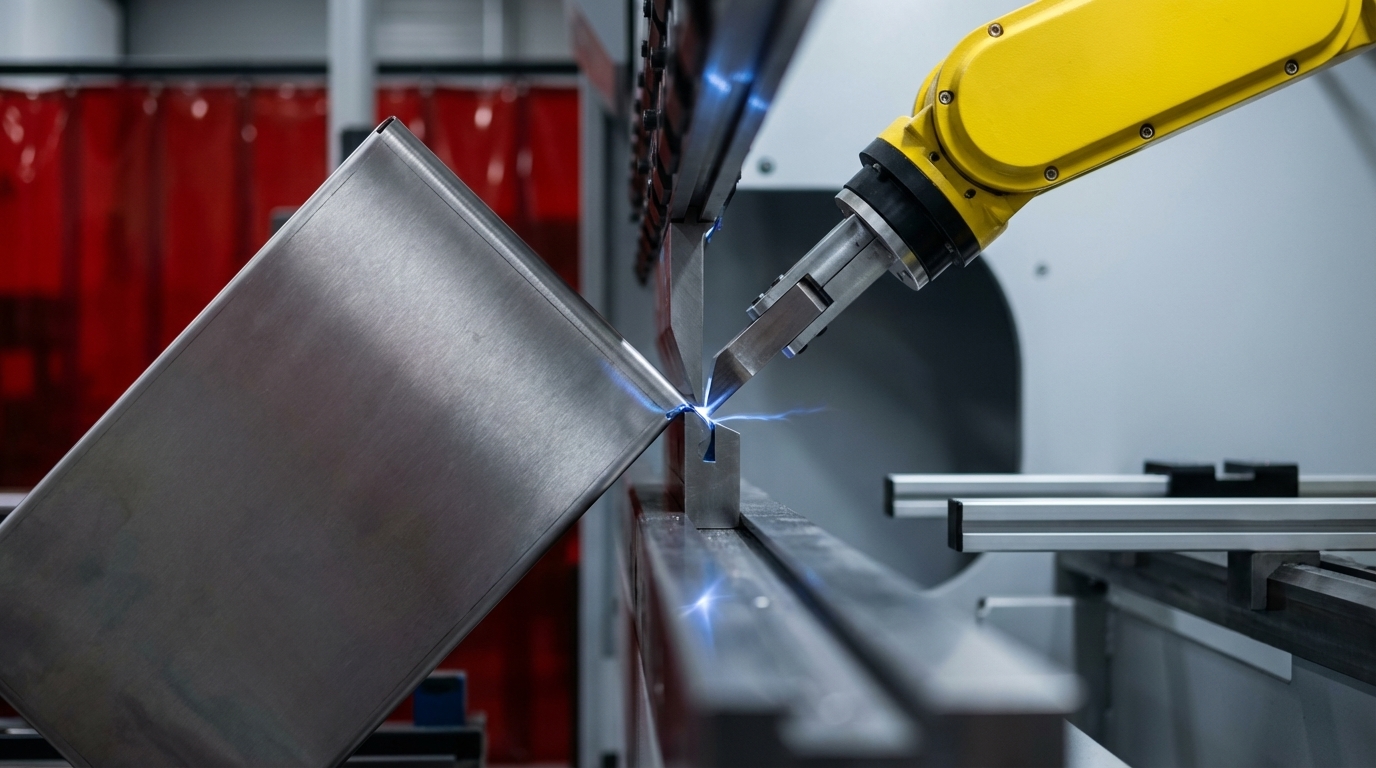
Professional CNC machining and sheet metal fabrication deliver production-intent prototypes with full material properties and finishing options. CNC machining lead times for simple prototype parts range from 3-7 business days, and sheet metal fabrication offers similar timelines with integrated bending, welding, and finishing capabilities. Fabcon’s vertically integrated facilities combine laser cutting, CNC punching, forming, and assembly under one roof.
The table below summarizes how each method trades off speed, cost, fidelity, and scalability. Use it to match your current validation goals and budget to the most practical approach.
| Method | Speed | Cost | Fidelity | Scalability |
|---|---|---|---|---|
| Cardboard | 1 hr | $0 | Low | Poor |
| 3D Print | 1 day | $10-100 | Medium | Low |
| Laser | 1-2 days | $50-200 | Good | Medium |
| Off-Shelf | Same-day | $20-100 | Low-Medium | Poor |
| CNC Sheet (Fabcon) | 2-7 days | $500-2k | High | Excellent |
Professional sheet metal fabrication provides the highest fidelity and scalability for enclosure prototypes. Validate your design with production-intent materials and processes through Fabcon’s quick-turn sheet metal service.
Step-by-Step Rapid Prototyping Workflow
This five-step workflow keeps your enclosure prototypes moving quickly while protecting design integrity and manufacturability.
Step 1: Measure and Sketch Requirements
Document all internal components including PCB dimensions, connector locations, cable routing paths, and thermal management requirements. Define ingress protection (IP) ratings, material preferences, and mounting constraints. Create initial sketches that show component layout and the overall enclosure envelope.
Step 2: CAD Design in Fusion 360
Import 3D models of internal components to establish accurate spatial relationships. Use parametric modeling techniques to support rapid design iterations. Apply basic DFM principles such as appropriate wall thicknesses, bend radii, and manufacturing-friendly geometries. Fusion 360’s sheet metal workspace provides specialized tools for enclosure design with automatic flat pattern generation.
Step 3: Choose and Build Prototype Method
Select the appropriate prototyping method based on validation requirements and timeline constraints. As noted earlier, 3D printing delivers parts in 24-72 hours, while CNC machining typically delivers parts in under two weeks. Consider parallel prototyping approaches where different methods validate specific aspects at the same time.
Step 4: Test and Iterate
Run comprehensive testing that covers PCB fit verification, thermal performance evaluation, and mechanical stress analysis. Common failure modes include component interference, inadequate clearances, and thermal hot spots. Document all issues and prioritize fixes based on functional impact.
Step 5: DFM Review and Production Planning
Collaborate with manufacturing partners to refine designs for production scalability. This collaboration should focus on reviewing tolerances, material specifications, and assembly sequences, because these elements often change when moving from prototype to volume production. Fabcon’s engineering team provides DFM feedback during the quoting process and identifies potential manufacturing challenges before you invest in tooling.
This workflow supports multiple design iterations within compressed development timelines while still preparing for a smooth transition to production. Request a quote to get DFM feedback on your enclosure design before committing to tooling.
From Prototype to Production: DFM Checks That Prevent Delays
Strong prototype-to-production transitions depend on early attention to manufacturing constraints and scalability factors that often stay hidden during initial builds.
Critical DFM considerations for sheet metal enclosures include bend radius specifications, hole placement relative to bends, and overall tolerance requirements. Standard inside bend radius should equal material thickness to prevent cracking and ensure accurate forming. Holes must be positioned at least 2.5 times material thickness from bend lines to avoid distortion.
These three DFM checks catch the most common sheet metal design errors that cause production delays.
| DFM Check | Benchmark |
|---|---|
| Bend Radius | ≥1× thickness |
| Hole Distance | 2.5× thickness from bend |
| Tolerances | Process dependent |
Validating these benchmarks during your prototype phase prevents costly redesigns when you scale to production. Plastic prototypes can mislead cost expectations for metal production, because material properties, forming limits, and finishing requirements differ significantly between processes.
Fabcon’s integrated approach combines fabrication, coating, and assembly capabilities, enabling seamless scaling from prototype quantities to hundreds of units within weeks. Because all processes happen under one roof, this vertical integration eliminates the vendor handoffs and supply chain complexity that appear when you manage multiple suppliers. This single-source model also enables agile manufacturing cells that adapt to changing volumes and product configurations more easily than large contract manufacturers with rigid production lines.
Early DFM collaboration prevents costly redesigns and ensures that prototype learnings translate effectively to production tooling and processes.
Tools and Pro Tips for Faster Enclosure Prototypes
Reliable tools and a few practical habits keep your enclosure prototyping process moving quickly. Essential tools include precision calipers for accurate measurements, CAD software with sheet metal capabilities, and access to local prototyping services. Fusion 360 offers comprehensive tutorials for enclosure design, and 2026 slicer software provides improved support generation and print quality for 3D printing applications.
Common troubleshooting issues include warping in 3D printed parts and component stack-up problems. PETG and Nylon materials provide better durability than PLA for functional prototypes, especially for snap-fit testing and thermal evaluation.
Fabcon’s online RFQ portal streamlines the quoting process for CNC and sheet metal prototypes and provides rapid feedback on manufacturability and cost drivers. Use these resources to shorten development timelines while maintaining quality standards.
FAQ
How do you prototype enclosures quickly?
The fastest approach combines multiple methods based on validation requirements. Start with cardboard or foam for initial fit checks within hours, then move to 3D printing for functional testing within 24-48 hours. For production-intent validation, CNC machining and sheet metal fabrication deliver high-fidelity prototypes in 2-7 days. Parallel prototyping, where different methods validate specific aspects at the same time, compresses overall timelines.
What’s the fastest method for metal enclosure prototypes?
CNC machining and sheet metal quick-turn services provide the fastest path to metal prototypes, typically delivering parts in 2-7 business days. Fabcon’s integrated facilities combine laser cutting, forming, and finishing under one roof and achieve consistent 2-week delivery timelines for complex assemblies. Rush services can reduce timelines further with premium pricing.
How long does prototype-to-production transition take?
Timeline depends on design complexity and manufacturing readiness. Well-designed prototypes with proper DFM consideration can transition to production within 4-6 weeks. This window includes tooling setup, first article inspection, and process validation. Fabcon’s integrated facilities mentioned earlier eliminate vendor transitions and reduce typical timelines by 30-40% compared to managing multiple suppliers.
What does one enclosure prototype cost?
Costs range from $10 for basic 3D printed prototypes to $2,000 for complex CNC machined assemblies with finishing. Sheet metal prototypes typically cost $200-800 depending on size, complexity, and finishing requirements. Fabcon focuses on total program cost rather than individual piece price and supports cost-effective scaling from prototype to mid-volume production.
What’s the best rapid prototyping method for enclosures?
CNC machining and sheet metal fabrication provide a strong combination of speed, fidelity, and scalability for enclosure prototypes. These methods deliver production-intent materials and properties while maintaining reasonable lead times. 3D printing works well for initial validation but lacks the durability and material properties needed for comprehensive testing. Many teams combine several methods throughout the development process.
What are key Fusion 360 enclosure design tips?
Use parametric modeling to support rapid design iterations and maintain design intent through changes. Import accurate 3D models of internal components to ensure proper fit and clearances. Use Fusion 360’s sheet metal workspace for enclosure design with automatic flat pattern generation and bend allowance calculations. Apply appropriate clearances based on manufacturing method, typically 0.5 mm for precision processes and 1.0 mm for FDM printing. Use design generators for standard features like mounting holes and connector cutouts to maintain consistency.
Ready to accelerate your enclosure development timeline? Start with Fabcon’s quick-turn prototyping service to get production-ready enclosures in 2-7 days with seamless scaling to volume.